How to Add a Size Chart in Shopify Product Pages

Uncertainty around sizing is a major reason customers abandon online purchases. Without guidance, buyers struggle to choose the right size, resulting in abandoned carts or costly returns, particularly for catalogs with numerous product variants.
The issue intensifies with international sales, where size conversions (e.g., inches vs. centimeters, US vs. EU sizes) are expected. Without clear charts, you risk increased support tickets, exchanges, and unhappy customers.
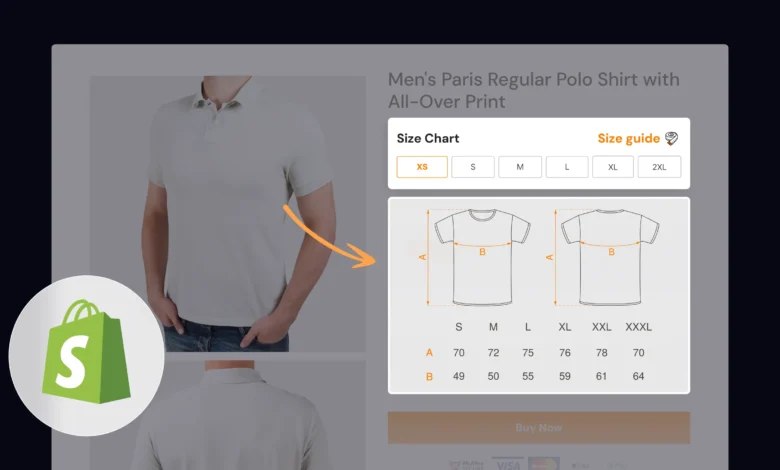
The solution: provide an easy-to-access size chart on the product page. A well-designed chart fosters trust, minimizes friction, and enhances conversions. Combined with automated workflows like StarApps variant image handling, you can seamlessly align size guidance with variant images.
In this blog, you’ll learn how to add size charts in Shopify, methods from no-code to custom, best practices for stores with many variants, and an effective rollout strategy to measure results.
Why a Size Chart Matters for Shopify Stores
Size charts are more than just a table of measurements; they act as a bridge between the physical shopping experience and the uncertainty of online purchases. For US-based Shopify merchants, especially those in highly competitive categories such as apparel and footwear, a missing size guide can lead to significant revenue losses.
Here are a few clear reasons why adding size charts improves your store’s performance:
- Reduces returns and exchanges: Customers choose the right size the first time, saving you shipping costs and restocking effort.
- Boosts buyer confidence: Shoppers see accurate measurements and feel reassured about their purchase.
- Supports international customers: Conversion between US, UK, and EU sizing helps global buyers make accurate selections.
- Improves SEO and accessibility: Adding descriptive alt text and responsive images to size charts enhances search visibility and inclusivity.
- Keeps customer support lean: Fewer queries like “Does this run small?” mean your team spends less time answering repetitive questions.
In short, a clear and dependable size chart is not just a UX feature; it directly affects profitability.
Methods to Add a Size Chart in Shopify
Different stores have varying needs, depending on their technical requirements, catalog size, and design preferences. Shopify gives you flexibility with multiple approaches, and here’s how they compare:
- Metafields + Theme Editor (Best balance of control and scalability): Shopify’s Online Store 2.0 introduced metafields, which allow you to attach custom data (such as a size chart image or page) to each product. This means every product can have its guide without duplicating code.
- Size Chart Apps (Quick and no-code): Apps in the Shopify App Store provide pre-designed templates, pop-up functionality, and product-specific assignment. These are perfect if you prefer a drag-and-drop approach.
- Hard-Coded Popup or Block (For Developers/Agencies): If you or your agency are comfortable editing Liquid, you can build a custom modal popup. This approach provides you with unlimited design control, but it requires more maintenance.
Each of these methods has its place. For growing catalogs or Shopify Plus stores, metafields are the sweet spot because they scale cleanly and integrate well with product templates.
Step-by-Step Guide: Adding a Size Chart with Metafields
This method combines Shopify’s native metafields with your theme editor. It avoids extra app costs and is flexible enough for both small and large stores. Here’s the process broken down:
1. Create a Size Chart Page or Image
- Go to Online Store > Pages > Add page.
- Title it “Size Chart” and paste your chart as an HTML table or upload an image.
- If you prefer images, ensure they’re mobile-friendly and optimized for speed.
This page serves as a centralized reference, but you can also assign product-specific files later.
2. Define a Product Metafield
- Navigate to Settings > Custom Data (Metafields) > Products > Add definition.
- Name the field Size Chart.
- Choose the type: File (for an uploaded image) or Page (to link your size-chart page).
Metafields enable you to attach unique charts per product, allowing you to display one chart for shoes, another for shirts, and so on.
3. Assign Charts to Products
- Open a product in admin and scroll to the new metafield.
- Upload the image file or link to the chart page.
- Save changes, repeat for all relevant products.
4. Display the Chart in Your Product Template
Most modern Shopify themes (built on Online Store 2.0) allow you to add a new block and connect it directly to the metafield you created. This is the quickest and cleanest option since it doesn’t require code and keeps the process fully visual.
If your theme doesn’t provide a metafield block out of the box, you can still achieve the same outcome with a small manual adjustment. By inserting a short piece of Liquid code into your product template, the theme will automatically detect whether a size chart exists for the product and then display it. That way, only products with an assigned chart will show the block, while others remain uncluttered.
By completing this step, your customers will always see a size chart where it’s relevant, integrated smoothly into the product page. This creates a consistent shopping experience and removes the need for buyers to leave the page or search for sizing details elsewhere.
By the end of these steps, your customers will see a relevant and clean size chart directly on each product page without extra clicks.
Adding a Popup for Cleaner Layout
Sometimes you don’t want a size chart taking up space on the product page, especially if your chart is detailed. In that case, a pop-up works better.
Here’s how you can set it up:
- Create a dedicated Size Chart page or image.
- In your theme editor, add a button labeled “Size Guide” next to the size selector.
- Link the button to the metafield or page and configure it to open in a modal window.
- Use minimal JavaScript or your theme’s built-in modal block to show the content.
Benefits of the pop-up approach:
- Keeps product pages clean and focused on the purchase process.
- Works well on mobile, where space is limited.
- Let’s you reuse one chart across multiple products without clutter.
A pop-up approach ensures you deliver the right information without overwhelming the buyer visually.
Best Practices for Size Charts in Shopify
Adding the chart is the first step; making it effective requires extra care. Here are the best practices to follow:
- Responsive images: Always upload high-quality but lightweight photos (JPEG/PNG/WebP).
- Clear units: Lead with inches for US buyers but also include centimeters for international customers.
- Alt text: Example: “Size chart – Women’s cotton dress” for SEO and accessibility.
- Bulk assignment: If you have hundreds of SKUs, use CSV import tools or scripts to assign metafields at scale.
- Category-specific charts: Shoes, shirts, and accessories need different charts. Don’t reuse one across all.
- Consistency: Maintain uniform font sizes and formatting across all products for a professional appearance.
When applied consistently, these practices turn a simple chart into a trust-building element that helps conversions.
Scaling for Large Catalogs and Agencies
For large catalogs or agencies managing multiple Shopify Plus stores, creating and maintaining size charts can become challenging without a dedicated system. Here’s how to keep them manageable:
- Use naming conventions: size_chart_shoes, size_chart_tops, size_chart_rings for clarity.
- Centralize assets: Keep charts in one folder or on a single page for quick updates.
- Automate with workflows: Pair size charts with variant images, so when a shopper clicks on “Large Red Shirt,” the right variant image and chart display together.
- Leverage theme sections: Build a reusable size-chart section that can be enabled/disabled per product.
With this setup, even stores with thousands of SKUs can quickly roll out consistent and accurate charts.
Rollout Plan and Measuring Impact
Finally, don’t just add charts; measure their effectiveness. A structured rollout helps you prove ROI:
- Start with your top 20 products by traffic or returns.
- Implement metafield-based charts and monitor changes for 4–6 weeks.
- Track metrics such as:
- Return rate percentage
- Cart abandonment rate
- Size-related support tickets
- Conversion rate per product page
- Expand to the rest of the catalog once results confirm impact.
Most merchants find that even a slight reduction in returns offsets the effort of setup. Over time, consistent size guidance directly increases profit margins.
Conclusion
Adding a size chart to Shopify product pages isn’t just about reducing returns; it’s about creating a shopping experience that feels reliable and customer-first. Whether you use Shopify metafields, a ready-made app, or custom coding, the key is consistency and scalability. Start small, test results, and then expand across your catalog.
By doing this, you’ll not only build trust with your buyers but also protect your margins in a competitive online retail environment.


